Folding Knives
My Journey Learning the Art

As a knifemaker – one of the biggest challenges for me so far was to make a folding knife. After making fixed blades for over 25 years, I took 3 years off from my current knife work and focused on the world of folding knives.
I only work with stainless steels and do all my own heat treating. That’s what puts the soul into the knife and I want to be in control of that process. How the knife works is paramount to your reputation. I chose two stainless alloys for my new blades – 440C and ATS -34.
No more eyeballing it — building folders was going to be mega tight for tolerances. A few thousands of an inch can make the difference between the knife working properly or not. One of the first things I did was go out and buy a 4 decimal point Mitutyoto digital caliper that measures up to one 10,000 of an inch. It would help me to maintain the exactness that was necessary.
There would be a new learning curve in the heat treating of folders as compared to fixed blade knives as well.
In a fixed blade knife the whole thing is the same hardness, but in a folder, you have back springs, lock bars and other pieces that have to be spring tempered to make them do a different job than just being hard like the blade edge. It took lots of tests before I got the spring temper hardness to where it would work as I wanted it to. The learning curve never stops.
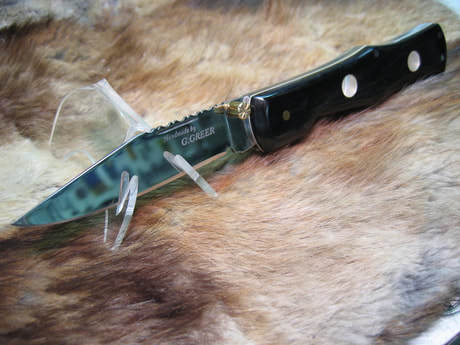
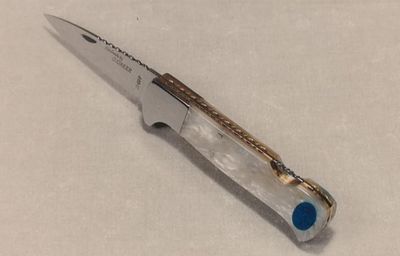
I had already acquired quite a good collection of “Jack Knives ” by the time I was ten, so I decided this is where I would start first……I designed and built my first slip joint – jackknife.
I tried to learn as much as I could building this knife. While I was at it, I added an improvement to the knife. The drawback to the old jackknife style is that it’s a 2-handed job to open them using the nail nick. My improvement was that I added a brass filed thumb fob opener in addition to the nail nick in order to turn it into a one hand opening unit.
I put stainless steel and white liners on it as well. I also added some pearl inlays just to give the knife some sparkle as well as some file work on the spine for some more decoration.
The next series of folder styles I tried making was called a Rear or a Front Locker. The difference between these and jackknives is that in this style the blades lock up when fully opened and have to be closed by depressing the unlocking bars located either in the rear or the front of the handle.
This made the process of designing and building this kind of mechanism one level more difficult. You now need to build a pivoting lock bar spring that floats between the frame liners. The lock bar has to be precisely ground to only a few thousandths for it to work smoothly.
I tried a few new things on this knife as well. I put on brass bolsters that were beveled at 45 degrees to lock in the buffalo horn scales. I also added more file work to the inner liners as well as on the lock bar this time. I did a mother of pearl inlaid oval on the center of each handle slab as well. If you have ever done inlays, you know how tedious and exacting this option is!! Especially when you have to do both sides the same. Those handle slabs are only 1/8 of an inch thick – that’s not much to work with when you mill a blind hole into the buffalo horn slabs.
The inlays are the last thing to be done on the finished blade – so there is no room for a mistake at this stage.


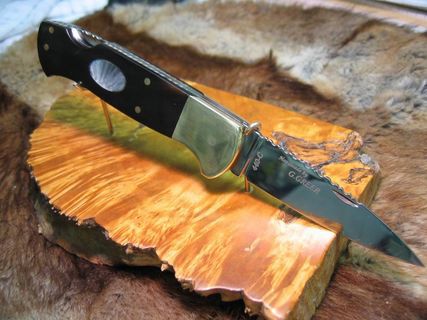
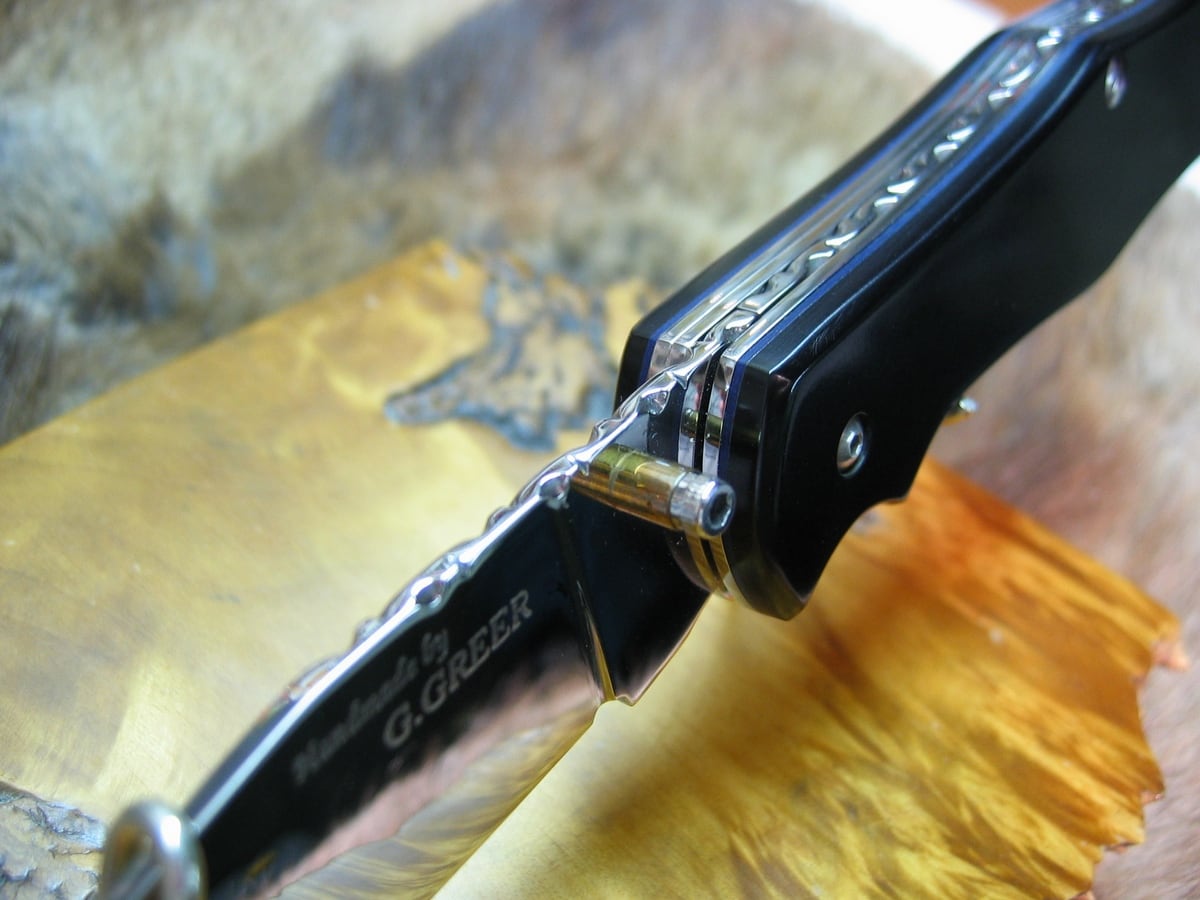
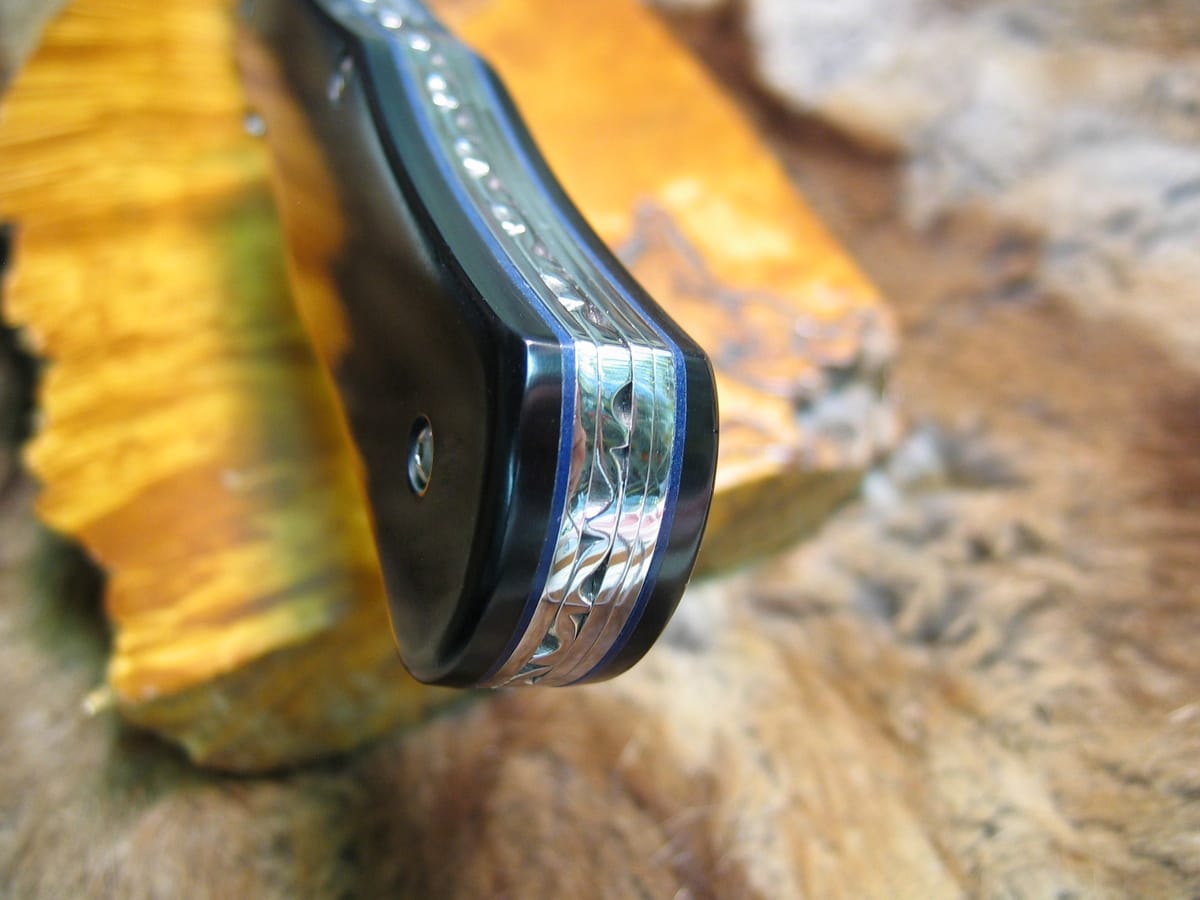
I thought I would make one more rear locking folder before I moved on – only this time I stretched my learning curve further on this knife. I used Pearl Polymer on the handle. I cut dovetailed stainless steel bolsters this time. Stainless steel is much more difficult to work with – more so than the previous knife using brass bolsters.
Also new – I used brass inner liners which I file-worked as well as the spine of the blade. I cut in turquoise ovals for the inlays on this one. I was really pleased the way this blade turned out for only my 3rd folder.
For the next level of difficulty I designed a series of knives using the liner lock mechanism. This is the most popular style of today. They are usually spring assisted or thumb fob opening blades. The main bonus is that they can be opened or closed with one hand and that’s the best you can get in my world as far a functionality goes.

The above liner lock knife has linen Micarta handles with dovetailed brass bolsters as well as white and stainless steel liners. I filed a brass thumb fob and put some more filework on the top of the blade. The liner lock release lever is in the cut out on the bottom of the bolsters.
The blade below is also a liner lock with a paper Micarta handle. I made this knife a little fancier. It has stainless steel and blue liners with a fully fileworked blade spine and butt. I made a matching stainless steel thumb fob on this one. The liner lock release lever is in the handle slab cut out again.
This is where the biggest challenge came in so far with the folders I had made. Up till now the pivot pins in the jack knives and the rear lockers were Peined pins and once set, the knives cannot be taken apart if a back spring breaks. I could see the writing on the wall for this style of knife if future repairs were ever needed.
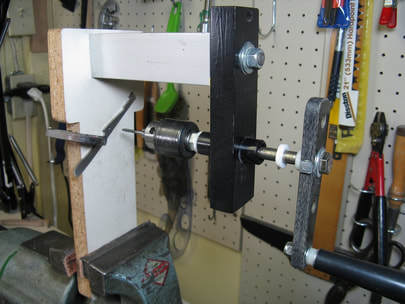
I had to design a blade where the knife could be disassembled if necessary. This meant that all the layers had to be drilled and tapped so that they could be threaded for tiny screws – like 2×56 threads. Try tapping a hole this size in a piece of stainless steel that is only 1/16 of an inch thick. It was very frustrating until I figured out the techniques. I had to build numerous jigs to perform these procedures. The most important jig was for tapping the tiny holes in the various pieces. These holes must be exactly 90 degrees to the piece being tapped. ( see above photo )
You can see the Torx headed screws in the handle slabs. These are opposing screws from each side going into a tapped support or pivot bushing. This is where my Mitutoyo digital calipers were a must. The making of these bushings was very exacting.
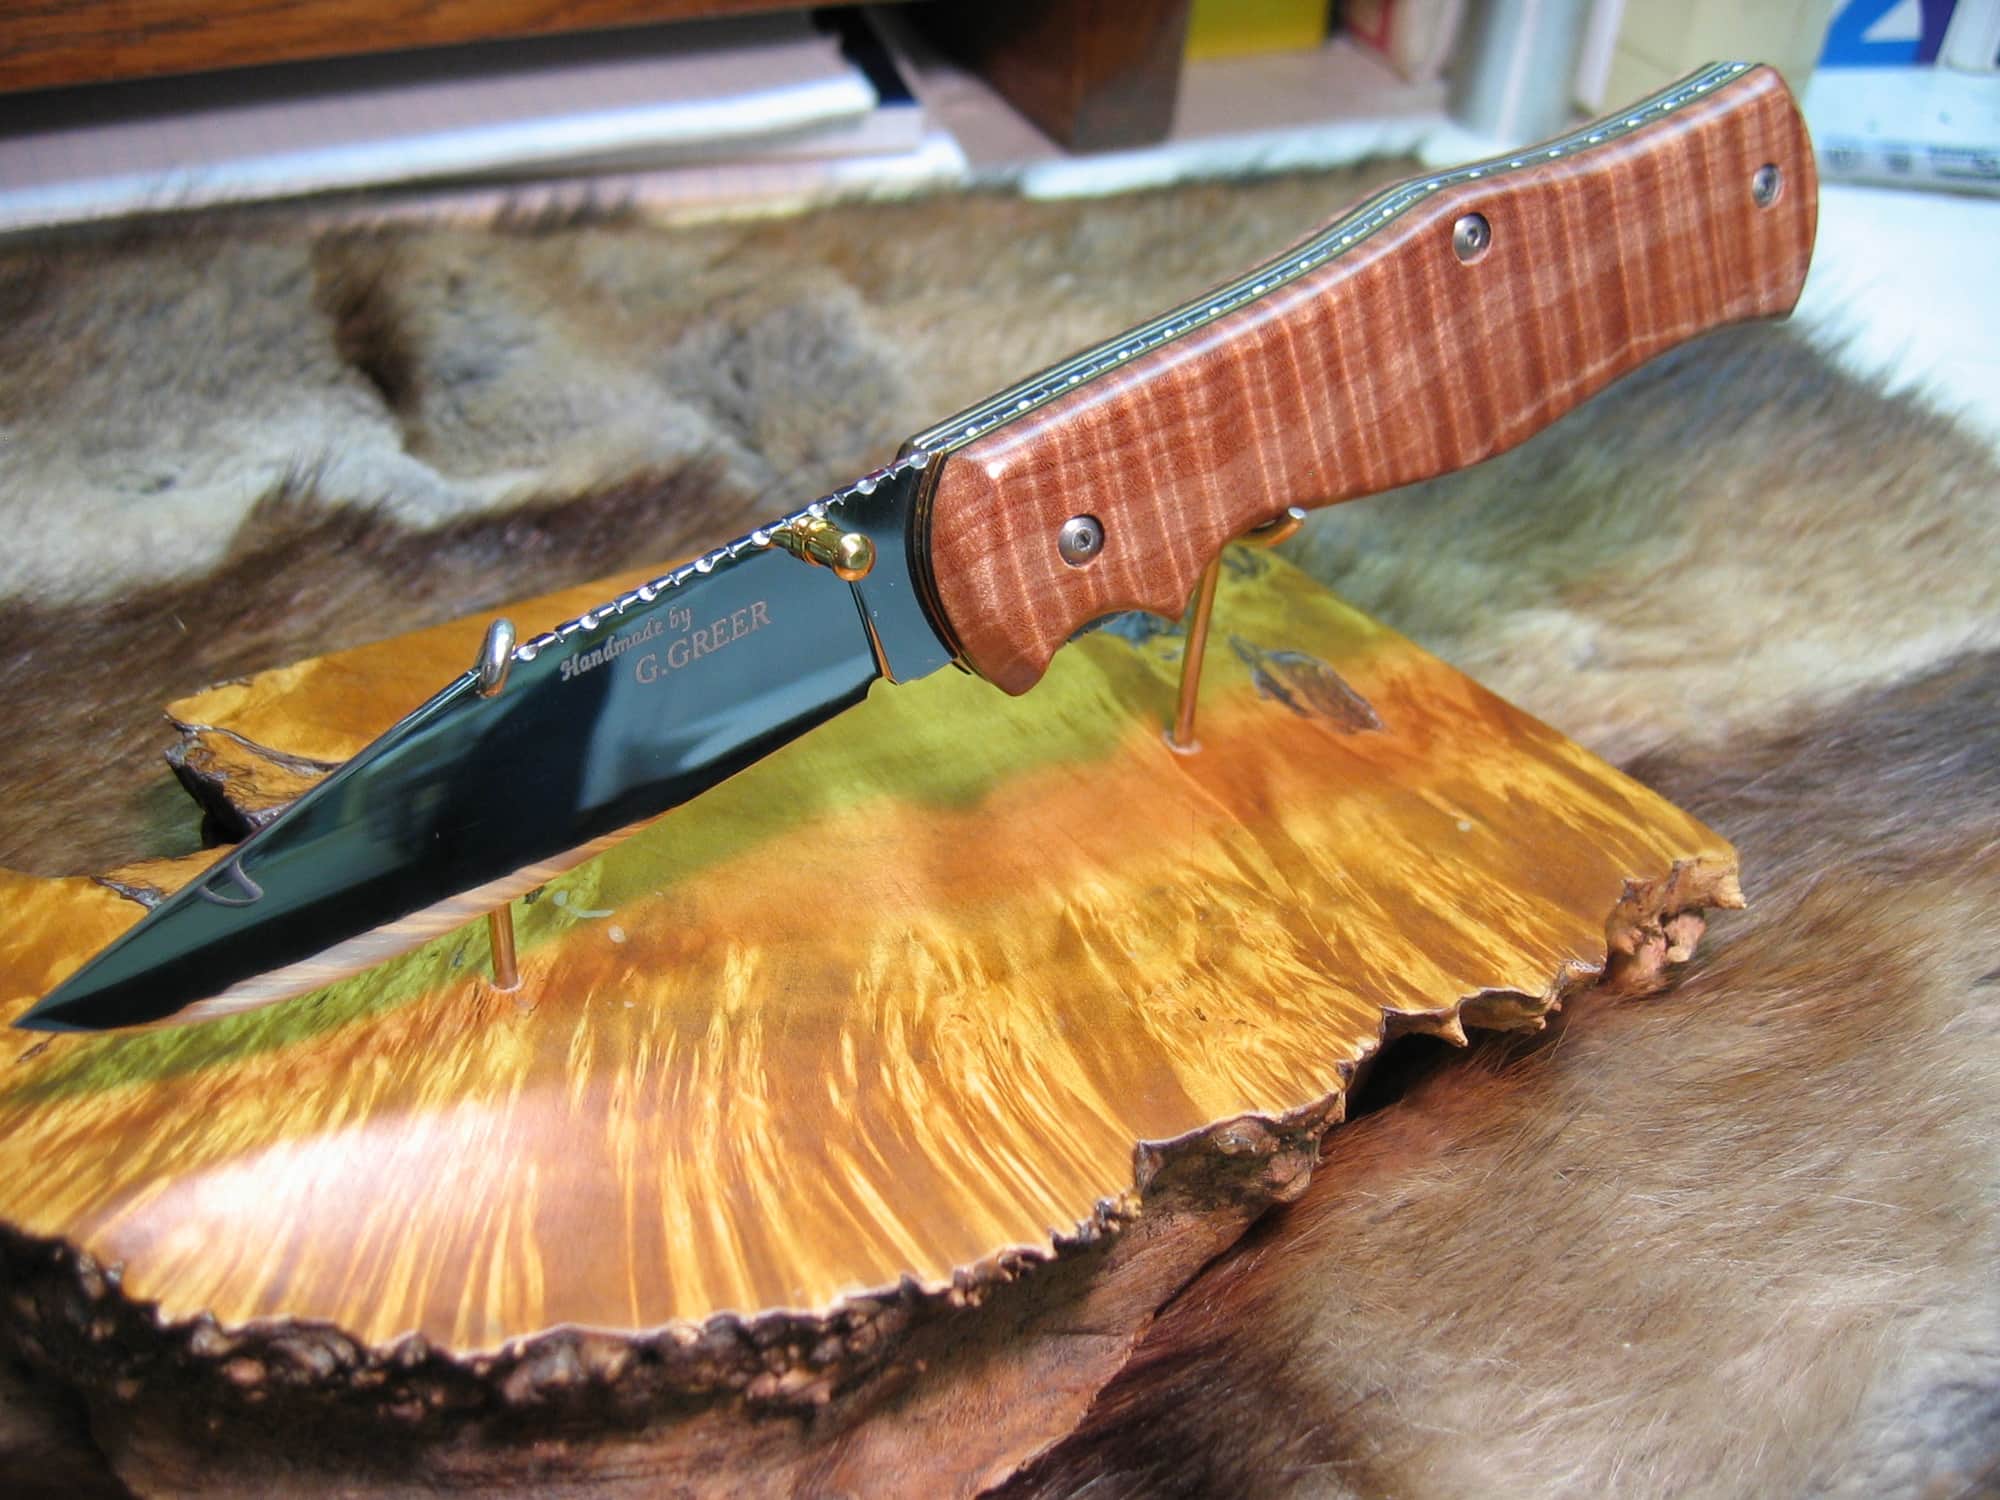
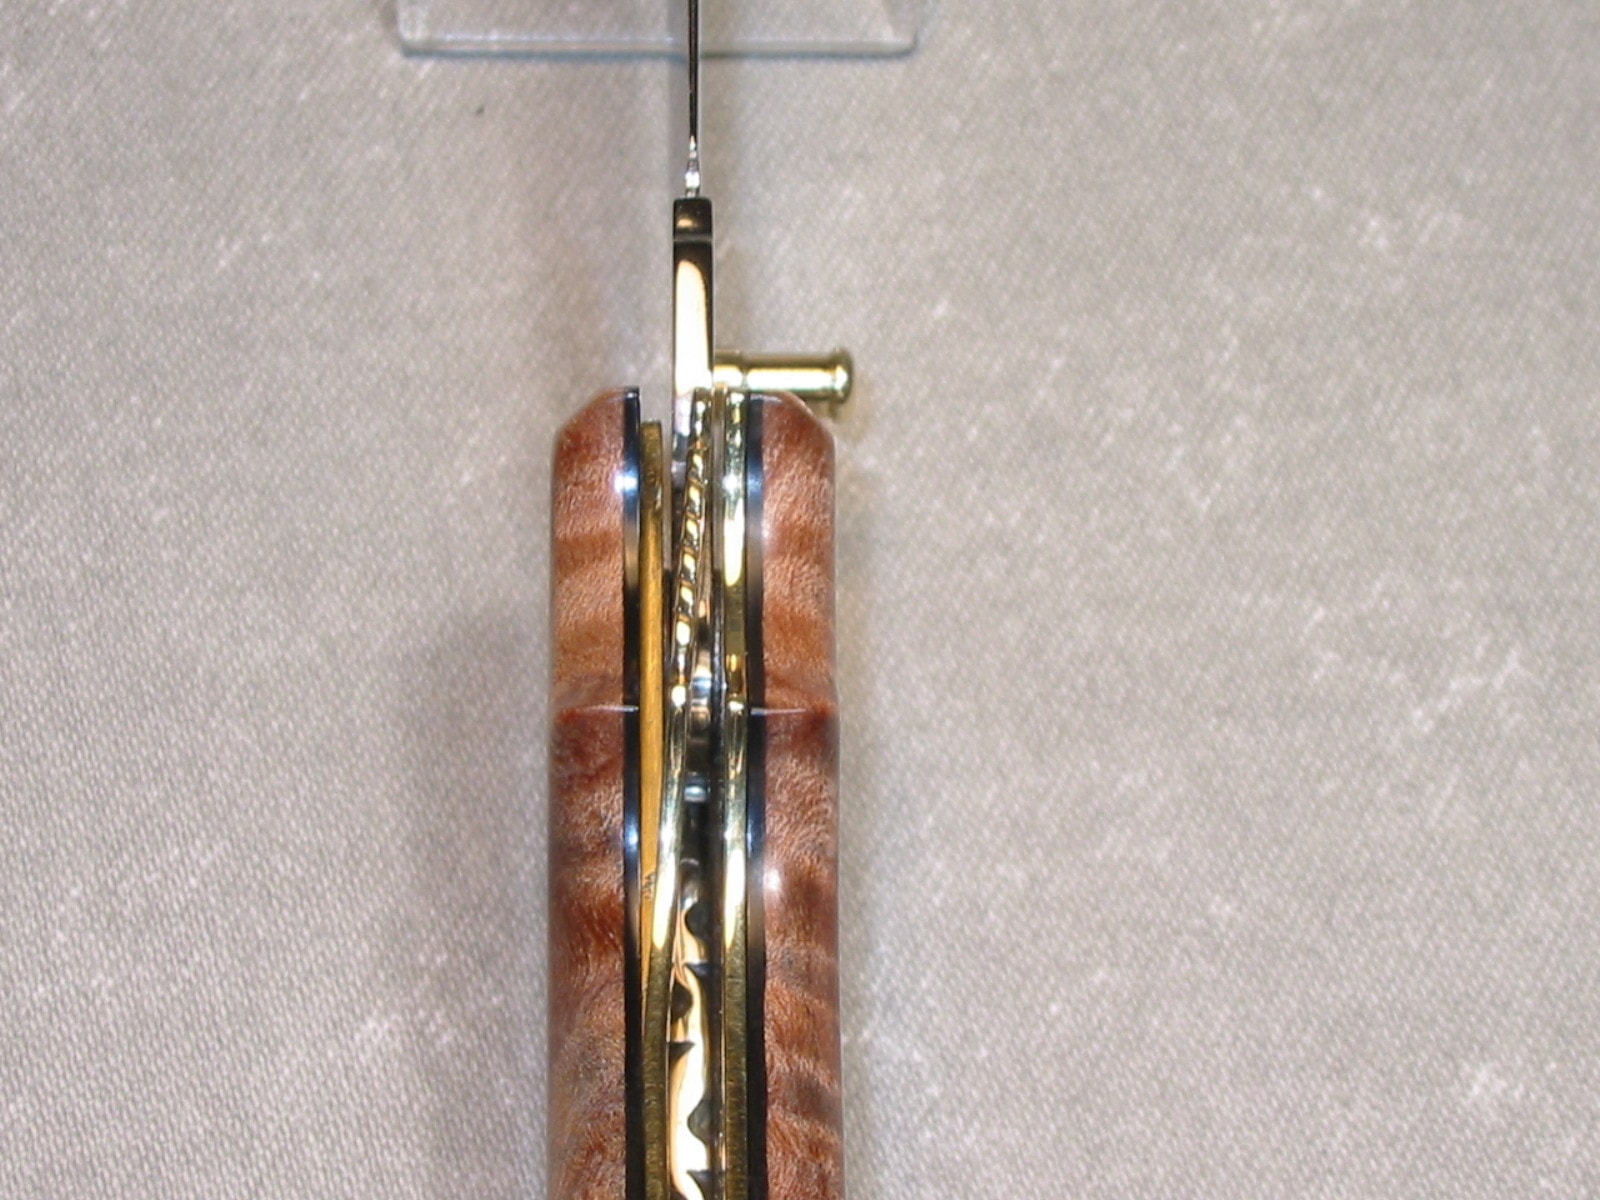
The next series of liner locks I designed were a little more ornate and I used various combinations of brass, black, blue or stainless steel for the inner liners and of course – lots of filework. I used stabilized woods for the handles of these knives.
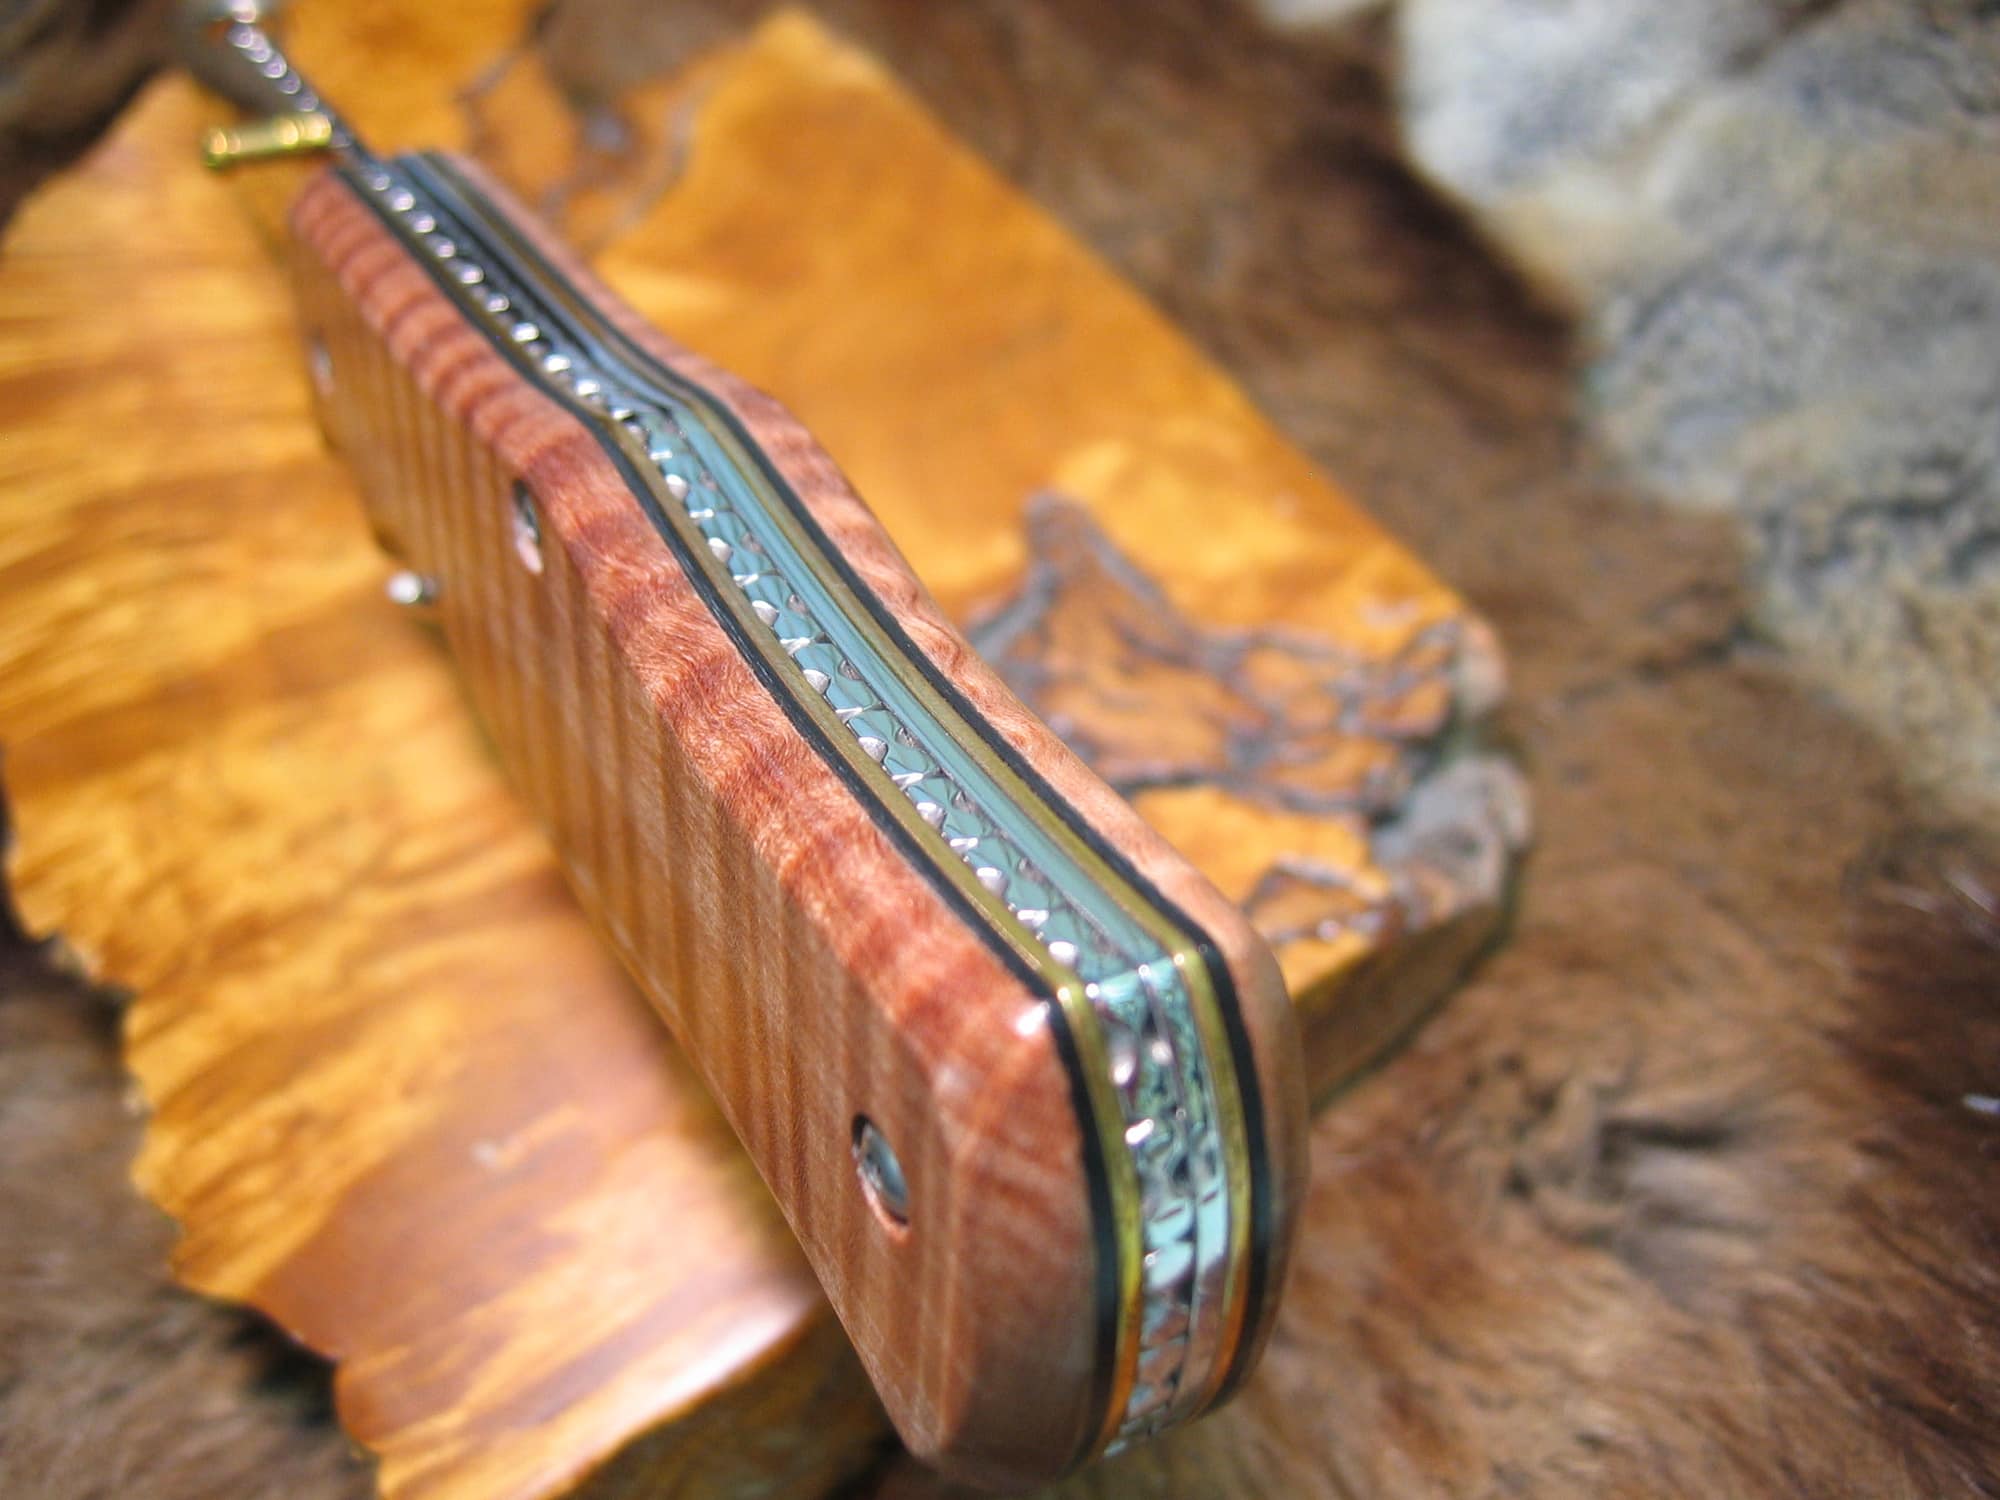
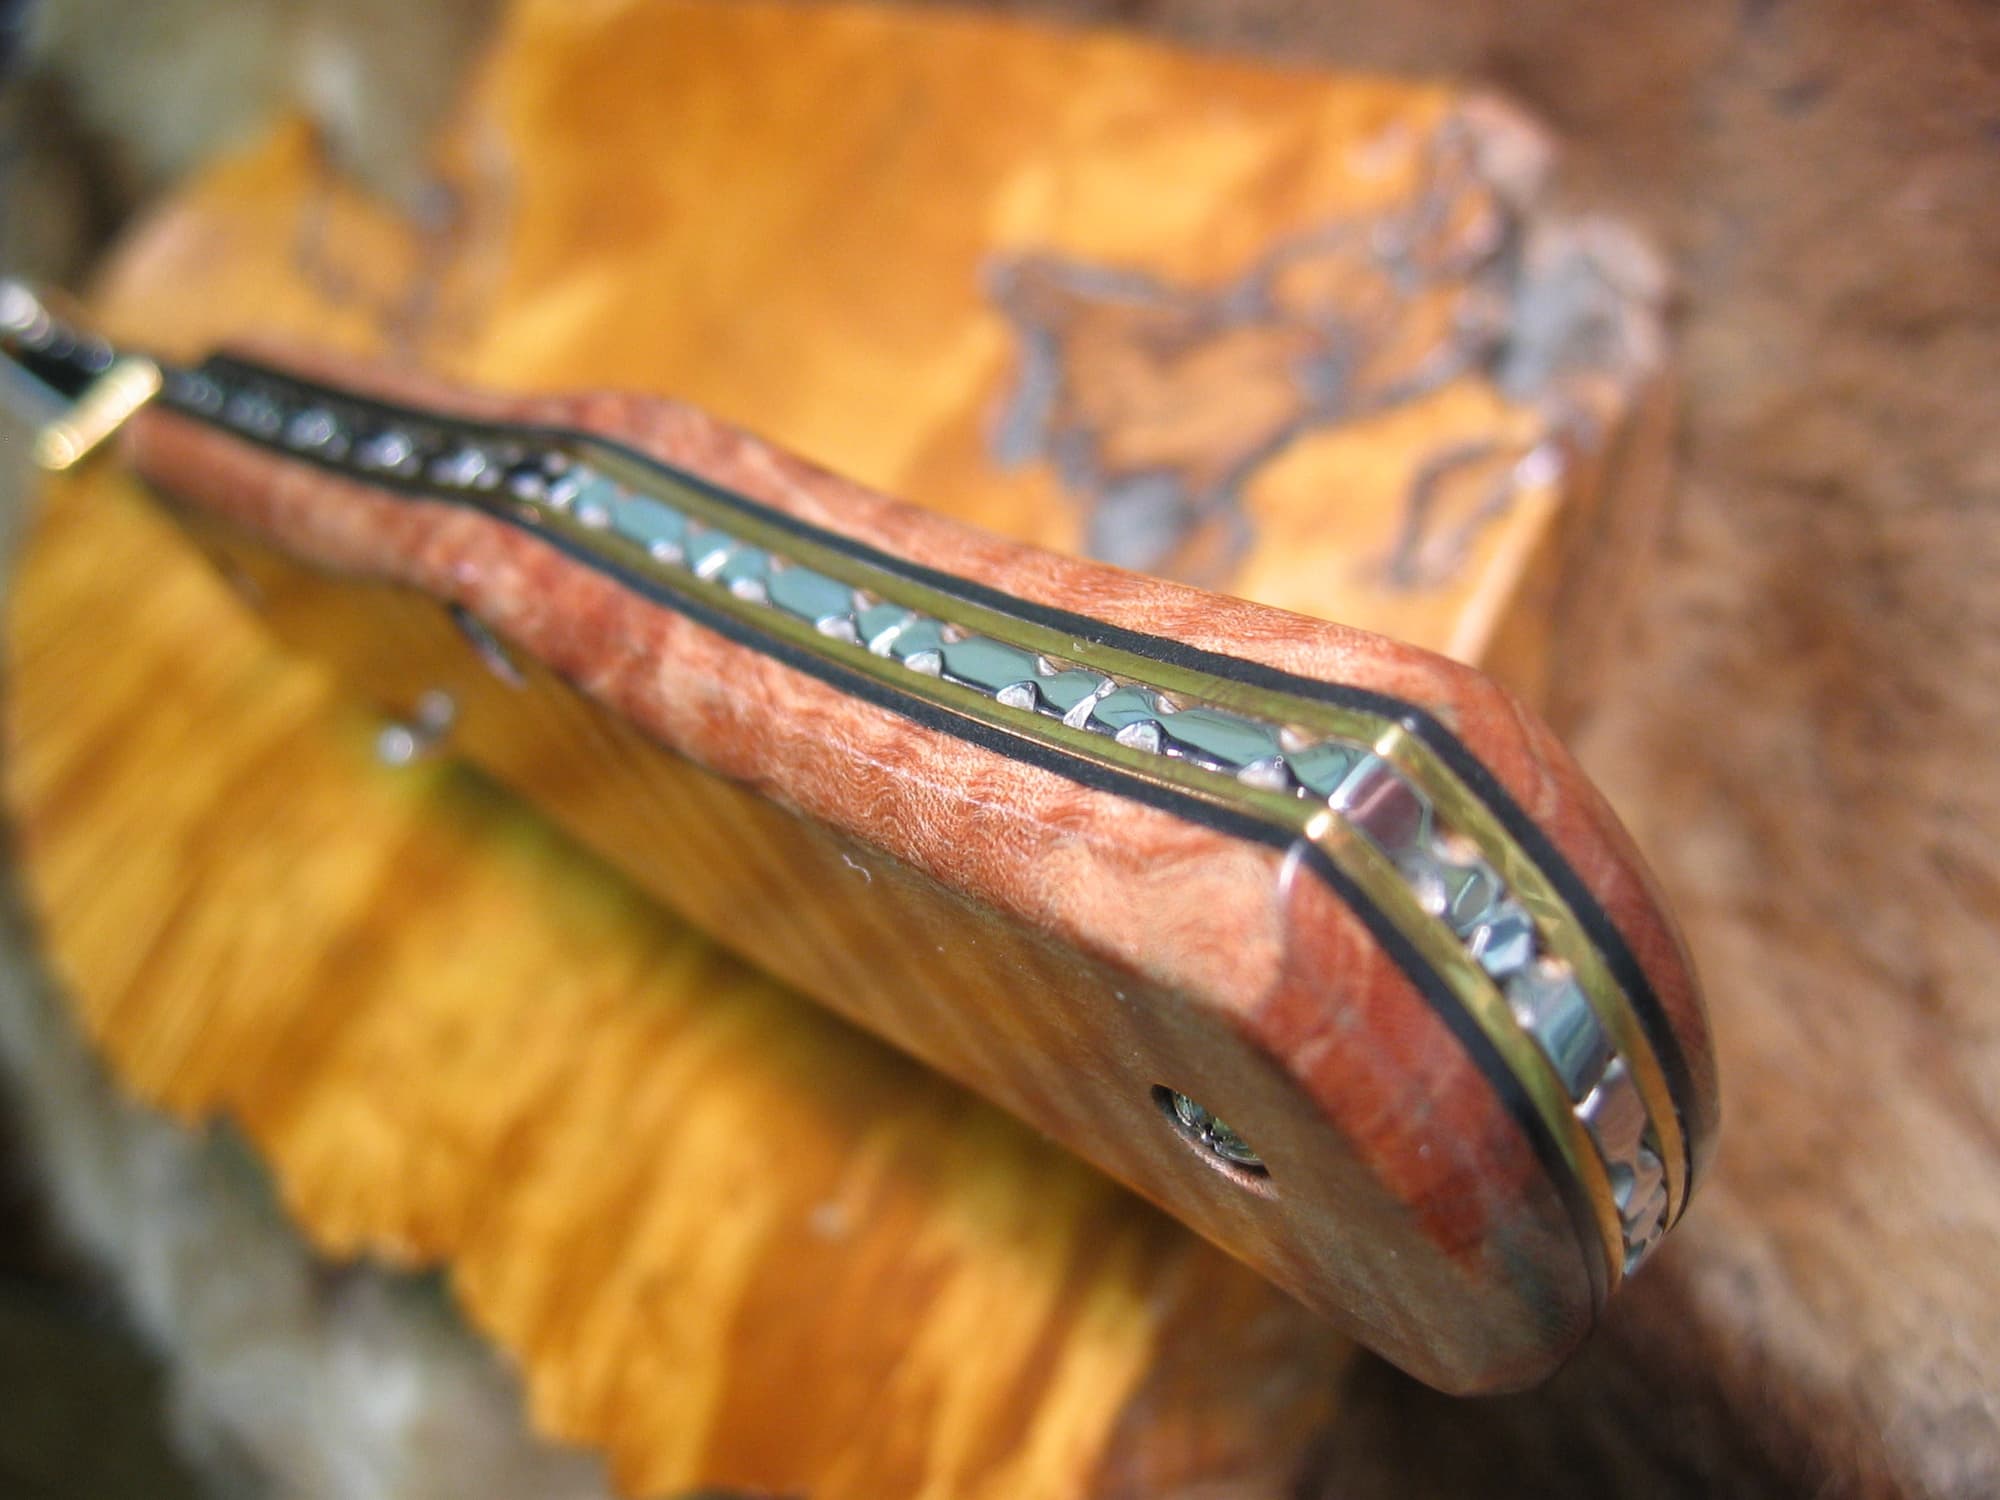
I tried some new things on this folder as well. I did some vine filework on the inner workings of the back spring and made the thumb fob a little more streamlined.
After 3 years of intense focus – designing and building folders – I had accomplished what I set out to do.
I am now back to making fixed blade knives again. The whole experience was really rewarding and made me a better knife maker. I now look at my new fixed bladed knives with the same precision that I learned doing these folders.